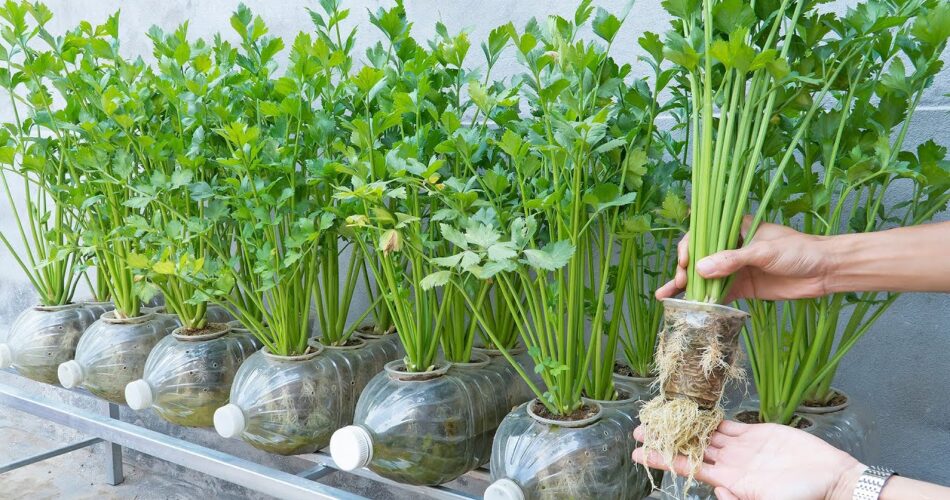
Growing hydroponic celery in recycled plastic bottles is an innovative and cost-effective way to produce fresh and healthy celery at home. Hydroponic systems provide nutrients directly to the plants’ roots in a soilless environment. Here’s a simple guide on how to grow cheap hydroponic celery using recycled plastic bottles:
Materials Needed:
- Recycled Plastic Bottles:
- Use large plastic bottles with caps. Cut them in half horizontally, keeping the upper part with the cap.
- Net Pots or DIY Net Cups:
- Create net pots from plastic containers or use pre-made net pots to hold the celery plants.
- Hydroponic Nutrient Solution:
- Choose a balanced hydroponic nutrient solution suitable for vegetables. Follow the manufacturer’s instructions for dilution.
- Growing Medium:
- Use a soilless growing medium like perlite, coconut coir, or a hydroponic growing medium.
- Celery Seeds or Seedlings:
- Purchase celery seeds or seedlings from a nursery or garden center.
- Hydroponic System Setup:
- Set up a simple hydroponic system using the plastic bottles, net pots, and nutrient solution.
- Support Structures:
- Install support structures or racks to hold the plastic bottles in place and allow the celery to grow vertically.
- Light Source:
- Place the hydroponic system in a location with sufficient natural sunlight or use artificial grow lights.
Steps:
- Prepare the Plastic Bottles:
- Cut the plastic bottles in half horizontally. Keep the upper part with the cap. This will serve as the container for the celery plant.
- Create Net Pots or Use Pre-made Net Cups:
- Cut or obtain net pots that fit into the mouth of the plastic bottles. These will hold the celery plants in place.
- Fill Net Pots with Growing Medium:
- Fill the net pots with the chosen soilless growing medium.
- Plant Celery Seeds or Seedlings:
- Plant celery seeds or transplant seedlings into the net pots filled with the growing medium.
- Prepare the Hydroponic Nutrient Solution:
- Mix the hydroponic nutrient solution according to the manufacturer’s instructions.
- Hydroponic System Setup:
- Fill the lower halves of the plastic bottles with the nutrient solution.
- Place the net pots with celery plants into the mouths of the plastic bottles, allowing the roots to reach the nutrient solution.
- Support Structures:
- Set up support structures or racks to hold the plastic bottles in a vertical position. This allows the celery to grow upward.
- Provide Adequate Light:
- Ensure that the hydroponic system receives sufficient natural sunlight or artificial grow lights for at least 6-8 hours per day.
- Maintain Nutrient Levels:
- Regularly monitor the nutrient solution levels and top up with fresh solution as needed.
- Harvesting:
- Harvest celery stalks when they reach the desired size. Cut the stalks at the base, leaving the plant to continue producing.
Tips:
- Recycling Bottles: Consider using bottles of the same size for uniformity. Ensure that the plastic bottles are thoroughly cleaned before use.
- Nutrient Solution Management: Regularly check and adjust the nutrient solution’s pH and concentration to meet the celery’s needs.
- Vertical Growing: Utilize the vertical space efficiently by arranging the plastic bottles in a vertical tower or hanging system.
By following these steps, you can create a simple and cost-effective hydroponic system for growing celery in recycled plastic bottles. This method allows for efficient use of space, water, and nutrients, resulting in a high-yield harvest of fresh and crisp celery.