Tips to spread orchids in plastic bottles: a 100% success rate with this method
Orchids are delicate and exotic plants that bring a touch of elegance to any space. If you have an orchid you want to spread, an efficient and inexpensive method is to do it in plastic bottles. This method has a 100% success rate if you follow some simple tips. Here is how to proceed:
Materials required:
- Transparent plastic bottles
- Birds
- Special orchid soil
- Orchids mothers to spread
- Water
Steps to follow:
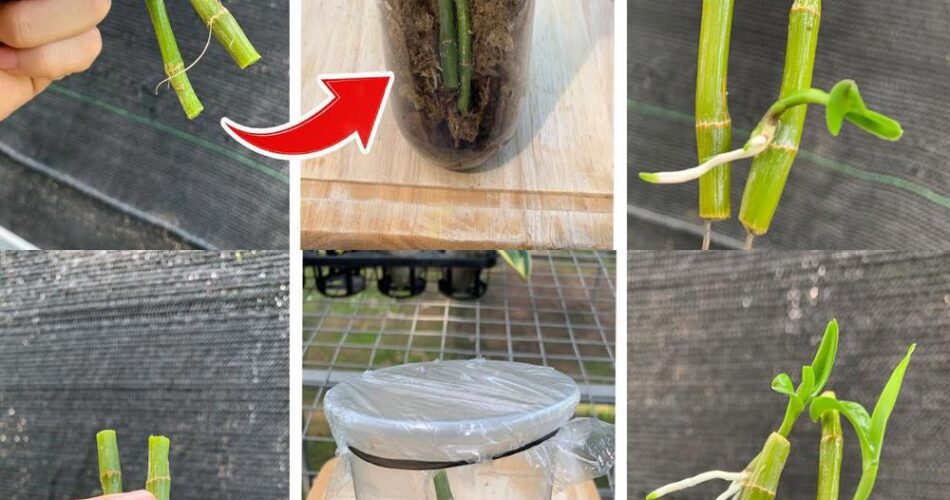
1. Preparation of plastic bottles
Start by cutting a plastic bottle in half, ensuring that the bottom part is deep enough to accommodate the orchid roots.
2. Preparation of substrate
Fill the bottom half of the bottle with special orchid soil. Make sure the substrate is well ventilated and draining to allow the orchid roots to grow properly.
3. Preparation of mother orchid
Choose a healthy mother orchid and gently cut one of its aerial stems containing roots. Make sure the roots are long enough to reach the substrate in the plastic bottle.
4. Orchid plantation in bottle
Insert the orchid roots into the substrate of the plastic bottle. Make sure the roots are well distributed and covered with soil. Water slightly to moisten the substrate.
5. Ideal atmosphere
Place the bottle containing the orchid in a bright place but without direct sunlight. Make sure to maintain a humid atmosphere by spraying water regularly.
6. Monitoring and maintenance
Monitor the condition of the orchid regularly, ensuring that the substrate remains moist but not wet. You will soon see new shoots and roots, indicating that the spread is successful.
7. Transplantation
Once new roots have developed, you may consider transplanting the orchid into a larger pot to promote its future growth.
With these simple tips, you can easily spread your orchids in plastic bottles with a 100% success rate. Take advantage of this affordable and efficient method to multiply your orchids and add beauty to your living space.